Monday, January 17, 2011
Process Art
The goal of preschool art is the process, not the finished product. Because of this, many of our 'projects' don't really end up looking like anything! When I pull out the paint in our preschool room, the question is not 'what are we making?' but 'what are we going to paint with?' We have used fruits, vegetables, pasta, cotton balls, q-tips, sponges, combs, cereal, suction cups, bubble wrap... ummm I think we have used paint brushes twice this year! The kids are learning that anything can be used for art, and it doesn't matter how their artwork turns out, it is their's. I try not to have a model for the children to compare with or use pre-printed pictures. Sometimes though, they are used as a fall back for 'those' days; the days when nothing seems to go right! The kids always have fun with our art 'projects' and usually have a long story to tell me about what it is! I love hearing their different takes on a painting that they did. Soooo, if your child brings home a strange painting and you are not sure what it is, just ask them! I'm sure they will have a really detailed explanation and story to tell you!
Wednesday, January 12, 2011
What to wear in the winter
Our theme this week is Winter Wear. We were very lucky to receive quite a bit of snow, soooo, we brought it inside!!!! The kids think it is the coolest thing to play with snow indoors!
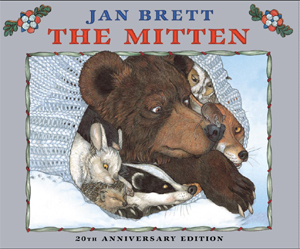
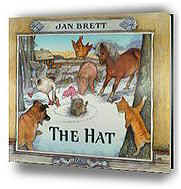
 Of course since we are talking about winter wear, we read the books 'The Mitten' and 'The Hat' both by Jan Brett. If you haven't read these, check them out; the illustrations are fantastic! We used some ideas from her website as well at http://www.janbrett.com/ We used the mittens and the animals to re-create the story of 'The Mitten'. The older class was able to lace the mittens together quite well.
For a more creative project the next day, we fingerpainted. Each child had two mitten cut outs. They fingerpainted one of the cut outs with LOTS of paint any way that they wanted. When they were finished, we placed the blank mitten on top of the painted mitten and pressed them together. When we took them apart two matching mittens were revealed!
We had a bit of a fine motor workout today; I have a picture of a bear who is in the snow but dressed in summer clothes. The children colored suitable winter clothes and then glued them onto the bear so he would stay warm. The project 'Bearly Warm' came from The Mailbox magazine Jan 2009.
All of the kids loved our new fingerplay today entitled 'What to Wear' , they had a great time clapping their hands and stomping their feet!
I added mittens and gloves to the Dramatic play center which the kids have diligently been practicing with. The older kids are doing very well with the gloves, while the younger ones are sticking with the mittens!
We also have mitten matching added to the math center. The template for this was found at http://www.prekinders.com/
Sunday, January 9, 2011
Snowmen!
This week we also talked about snowmen. I find that like snowflakes, snowmen are a wonderful way to teach children about individuality. Snowmen are also perfect for teaching children about geometric shapes; there are soooo many different shapes that go into making a snowman! One of the projects we did was make a 'shapes snowman'. The children were each given 3 white circles of different sizes, a piece of construction paper in their choice of color, geometric shapes, and a glue stick. From there they were encouraged to put their snowman together however they wished! It was really fun to see the different ways that children used the shapes to make their individual snowman. To go along with this project we read the book 'All You Need for a Snowman'. This is a fantastic book which takes you through all the steps of making a snowman!  We also sang a song about dressing a snowman that the kids loved!
Another snowman project we did was painting a snowman with cotton balls. I traced 3 circles onto construction paper. The children then painted in the circle using the cotton balls and white paint. The younger children smeared the paint around staying in the circle remarkably well. Some of the older children 'dotted' the cotton ball onto the paper which gave the snowmen more of a textured look! The children then added google eyes, orange triangle noses, and other items that they wanted to 'dress' their snowman. They all turned out really neat and are on display in our classroom. To go with this project, we read the book 'The Biggest Snowman Ever!' The song we sang to go along with this was an action song about rolling snowballs bigger and bigger to make a HUMONGUOUS snowman!
The last snowman project we did was to make a snowman chain. This was more of a fine motor project as it required the children to make paper chains. The kids did a great job helping each other which was the point of the project! We make a chain out of white paper that had 3 links. On the first link the children glued eyes, nose and mouth. The second line was left empty and on the third link, the children glued buttons. After these dried, we hung them on the ceiling where they look very nice! To go along with this we read 'Snow Friends' and sang 5 Little Snowmen!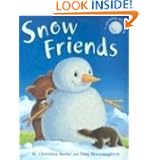
To go along with our snowmen theme, I added a snowman tangram printable from http://www.prekinders.com/ In our sensory box I put a bunch of cotton balls and added pretend people. The kids loved making the people play in the snow! In the dramatic play center I removed the Christmas items *sniff* and added snowmen cookie cutters and a snowman cooking apron. We had a wonderful, fun filled week even though we didn't get to play in the snow!
Another snowman project we did was painting a snowman with cotton balls. I traced 3 circles onto construction paper. The children then painted in the circle using the cotton balls and white paint. The younger children smeared the paint around staying in the circle remarkably well. Some of the older children 'dotted' the cotton ball onto the paper which gave the snowmen more of a textured look! The children then added google eyes, orange triangle noses, and other items that they wanted to 'dress' their snowman. They all turned out really neat and are on display in our classroom. To go with this project, we read the book 'The Biggest Snowman Ever!'
The last snowman project we did was to make a snowman chain. This was more of a fine motor project as it required the children to make paper chains. The kids did a great job helping each other which was the point of the project! We make a chain out of white paper that had 3 links. On the first link the children glued eyes, nose and mouth. The second line was left empty and on the third link, the children glued buttons. After these dried, we hung them on the ceiling where they look very nice! To go along with this we read 'Snow Friends' and sang 5 Little Snowmen!
To go along with our snowmen theme, I added a snowman tangram printable from http://www.prekinders.com/ In our sensory box I put a bunch of cotton balls and added pretend people. The kids loved making the people play in the snow! In the dramatic play center I removed the Christmas items *sniff* and added snowmen cookie cutters and a snowman cooking apron. We had a wonderful, fun filled week even though we didn't get to play in the snow!
Saturday, January 8, 2011
Snowflakes!
This week (January 3-7, 2011) we talked about snowmen and snowflakes. Unfortunately there was not enough snow to play in this particular week; if it is too cold outdoors, we simply put the snow in a bucket and play with it indoors. Ah well, maybe next week. Children are fascinated by snow; they always have so many questions! I love to use snowflakes to remind the children that they are all unique just like snowflakes! Of course we have to make lots of snowflake projects to go along with this lesson! We used paper doilies to make snowflakes- we taped several different sizes of paper doilies to a piece of construction paper in the child's choice of color. The children then sponge painted over the doilies. We removed the doilies when the children were done and they were very excited by the results! They were all very proud to hang their individual snowflakes in our classroom to show their friends and parents.
Another snowflake project we did was one I found in the Dec/Jan 2010/11 edition of 'The Mailbox. I gave each of the children several different sizes of green triangles and brown rectangles. They glued these where they wanted on a piece of dark blue or black construction paper to form a night time woods scene. We then used wagon wheel pasta dipped in white paint and pressed them all over the paper for snowflakes! They turned out fantastic, and once again, the children were able to see that no two snowflake pictures were the same!
For science, we looked at and compared close up photographs of snowflakes. The kids did great finding the differences in the snowflakes! In the math center I printed a snowflake tangram pattern from http://www.prekinders.com/ The kids had a great time putting all of the shapes into the correct place to form the snowflake pattern!
There is a way to save a snowflake for viewing by using superglue and a microscope slide, but I have never been able to get this work (mainly because I always glue my fingers together!) I found the instructions for this at http://www.ehow.com/how_2062910_save-snowflakes.html
I will try to post some pics of the kids completed snowflake artwork and get the info for the snowmen section we did this week as well!
Subscribe to:
Posts (Atom)